Ginger Jeans Camouflage!

Je ne sais pas par où commencer tellement j’adore tout de ce jean! Depuis le temps que je voulais le faire, je ne sais vraiment pas pourquoi j’ai attendu aussi longtemps… Bref, déjà il avait tout pour me plaire dans sa version B: slim et taille haute! Malgré mon premier essai non concluant de me faire un jean avec le patron Safran de Dear & Doe (à reprendre, mais pour le moment j’ai vraiment la flemme de tout découdre) je ne me suis pas laissée abattre et j’ai attaqué le Ginger avec un très bon pressentiment… et j’avais raison!

DSC_5518_Fotor

I love those jeans so much that I don’t know where to start! I’ve been wanting to make this pattern for a while and I don’t know why I’ve waited so long to do it… Anyway! It was made for me to love it in its B version: Slim fit & high waist! Even though my first attempt to make jeans with the Safran pattern of Deer & Doe wasn’t really a success (I must rip all seams off to make changes on the fit and I just can’t find the motivation to do it), I didn’t let that hold me back from trying another one and I started to make my Ginger’s with a feeling it was going to be a success… and I was right!

DSC_5510_Fotor

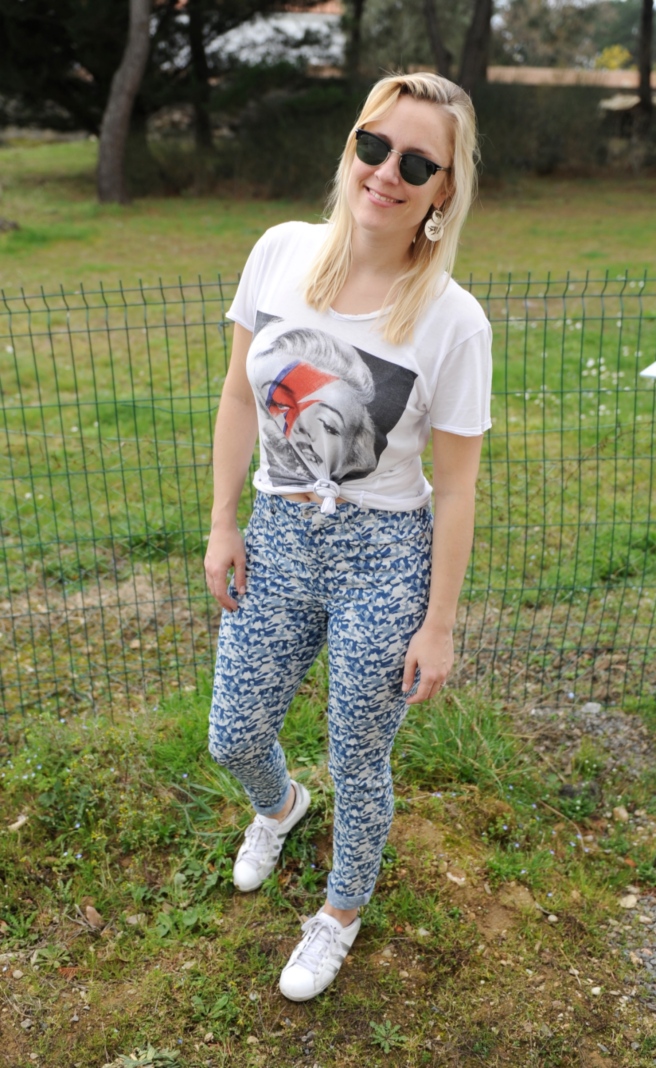
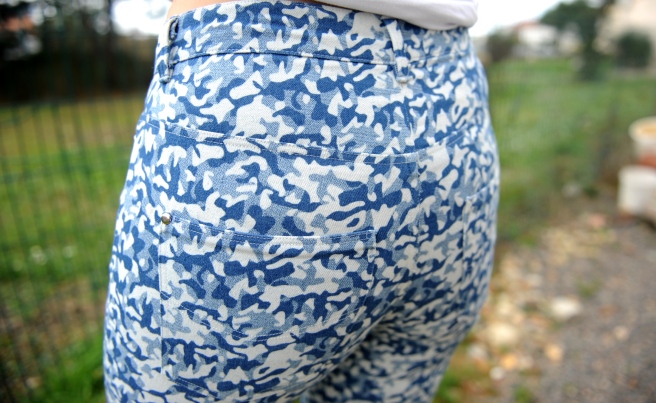
Commençons par le tissu que j’adore… C’est un jean camouflage dans un camaïeu de bleus trouvé chez Ma Petite Mercerie. Pour la petite histoire j’ai acheté ce tissu pour faire un short d’été pour mon père et en plus du fait qu’il a été très facile à coudre, mon père me dit souvent qu’il est super agréable à porter. En effet c’est un jean super léger avec 2% d’élasthanne donc j’en ai recommandé direct! Pour le reste j’ai tout trouvé aux Tissus du Renard: bouton spécial jeans (le même que pour mon Carlotta), rivets et fermeture éclair. Et celles qui me suivent sur instagram le savent déjà, la flemme d’aller aux Tissus du Renard pour de la doublure a fait qu’un tote bag a du être sacrifié pour les doublures de mes poches 😉

DSC_5520_Fotor

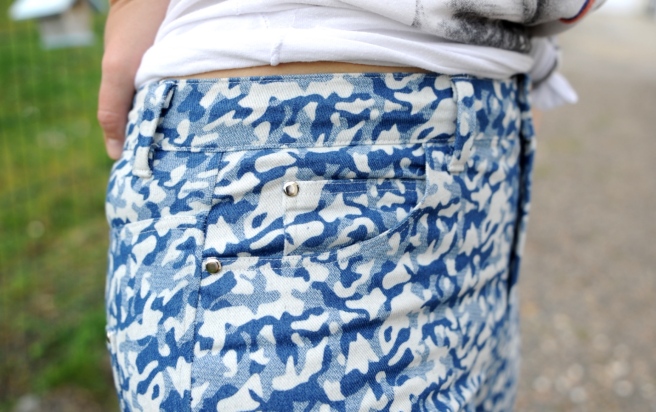
Let’s start with the fabric which I love, it is a « camouflage » jeans fabric in different shades of blue found on Ma Petite Mercerie. I purchased this fabric in the first place to make my dad summer shorts. In addition to the fact that it was a really easy fabric to work with, my dad keeps telling me it is really comfortable to wear. Indeed, it is a very light denim with 2% elasthanne, so I ordered some more right away! The rest of the supplies I found at Les Tissus du Renard: Jeans button (the same as on my Carlotta), rivets and zipper. Those of you who are following me on instagram, you already know I sacrified a tote bag to make my pockets lining as I was too lazy to go to the fabric store just to buy lining fabric 😉

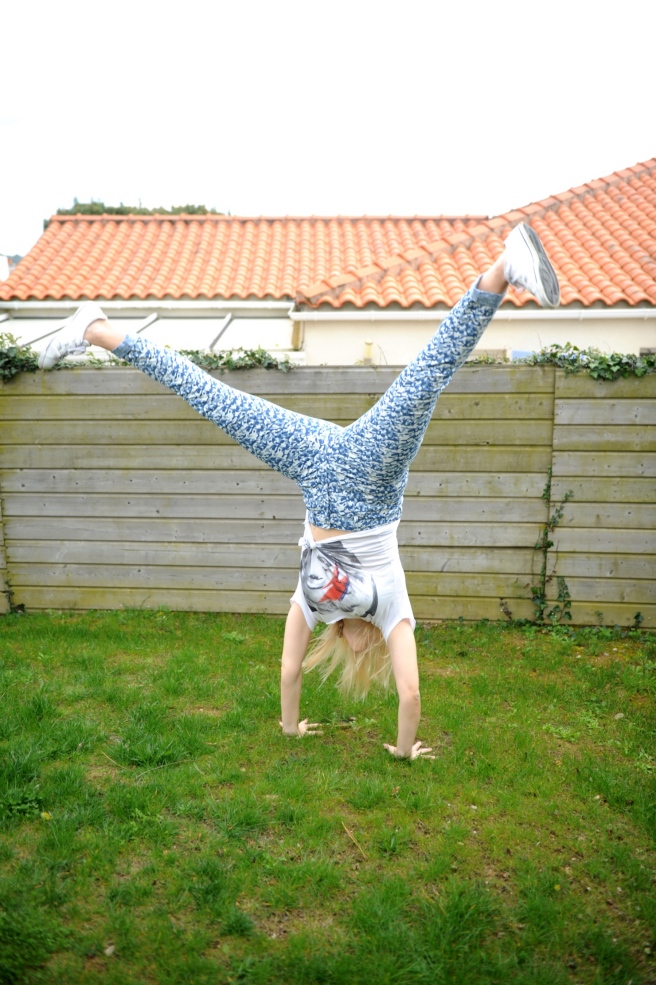
Maintenant LE patron. MERCI Heather d’avoir créé un patron de pantalon/jean pour les filles pulpeuses! Avec mes 1,05m et des paillettes de tour de hanches et mes 78cm de tour de taille, mon problème principal quand j’achète un jean est que pour y loger mes fesses je me retrouve avec une taille qui baille… Le Ginger Jeans n’est pas du tout come ça! Peut-être j’ai eu de la chance mais je n’ai fait aucune modification sur le patron. Pour la taille, vu que mon tissu est stretch et que les marges de coutures sont de 1,5 j’ai pris le risque de faire la taille un peu en dessous de mes mensurations, soit une taille 12. Et au final le fit est parfait. J’avais pris le soin de tout bâtir à la main pour vérifier le fit avant la couture définitive histoire d’éviter les mauvaises surprises… Je souligne également l’effet ventre plat grâce à la construction du patron qui attache les doublures des poches à la braguette, un rêve!

Now THE pattern. THANK YOU Heather for creating a pants/jeans pattern for curvy girls! With my (approx.) 1,05m hips and 78cm waist, my major problem when buying jeans is that the size that fits my booty is usually gaping at the waist. The Ginger Jeans won’t do that at all! It fits me perfectly! Maybe I was lucky but I didn’t change anything at all on the pattern. As my fabric is stretchy and the sewing allowances are 1,5cm I took the risk to make a size smaller that what my measurements said, so I made a size 12, and at the end the fit was perfect. I did baste everything by hand before the final stitch to check the fit and avoid any catastrophe… I must mention the « flat belly » effect thanks to the pants construction with the pockets lining attached to the zipper, a dream!


Vous l’aurez compris j’ai trouvé MON patron idéal de pantalon, tout à fait mon style, que je vais pouvoir décliner dans des matières différentes en fonction des saisons. Le patron est disponible en version papier et en PDF en anglais et en Français! Cocorico! Malgré un livret un peu succinct à mon goût (J’aime les visuels!), Closet Case Patterns se rattrape largement avec un Sew Along très détaillé sur son site. Pour les plus novices, il est possible de s’inscrire à un cours en ligne payant pour réaliser son jean parfait, vous l’aurez compris tout le monde peut donc y arriver, alors foncez!

So you understood I found MY perfect pants pattern, just my style, which I will be able to make in various fabrics depending on the season. The pattern is available printed and also downloadable in English and in French! Cocorico! Despite a booklet a bit too succint for me (I like visuals!), Closet Case Patterns is making it up with a much detailled Sew Along on their website. Beginners, you can also join an online class (charged) to make your own perfect jeans. Anyone can make it, so go for it!

DSC_5531_FotorCrédit photo: Stan D.

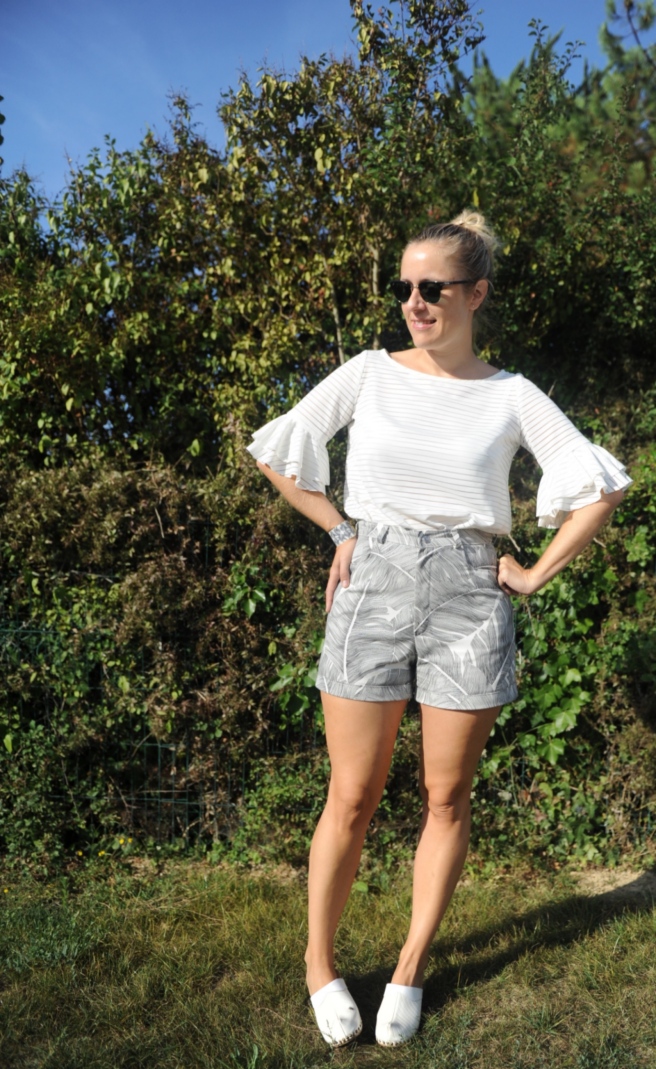
T-Shirt Eleven Paris, baskets/sneakers Adidas, boucles d’oreilles/earings Gas Bijoux, lunettes/shades Ray Ban

Mon (premier) manteau Saint-Michel!

dsc_5393_fotor

Pendant les soldes de Janvier 2016 (oui oui 2016…) j’avais flashé sur un manteau style caban chez Petit Bateau mais malgré la super remise je ne l’avais pas pris car trop court pour moi. Pour info je mesure 1,72m et je n’ai pas forcément un grand buste mais j’ai des bonnes hanches (106cm) et des cuisses qui n’aiment pas, mais alors pas du tout, n’être couvertes qu’à demi par un manteau…. C’est donc un poil déçue que je suis repartie bredouille mais après avoir posté ma frustration sur IG, vous avez été nombreuses à me conseiller le patron Saint-Michel de Cozy Little World qui effectivement se rapprochait beaucoup du caban tant convoité…

During the January 2016 sales (Yes 2016…) I had a big crush on a Sailor Coat from Petit Bateau but despite the huge discount I didn’t take it as it was too short for me. For your information, I am 1,72m high, my chest is not particularly big but I do have wide hips (106cm) & my thighs will never (ever) tolerate to be only half hidden by a coat. So it is with a bit of disapointment that I left the store and posted my frustration on IG and I received many comments advising me to go for the Saint-Michel Pattern from Cozy Little World which was indeed very close to the original object of my desire…

dsc_5405_fotor

J’ai donc tout acheté dans la foulée: patron pochette, laine bleue marine (sublime et ultra douce) aux Tissus du Renard, doublure en coton zèbre marine et blanche chez Pretty Mercerie et boutons demi-boules ancres argentés 23mm de chez Au Ch’ti Bouton.  J’avais tout, et tout est resté bien rangé pendant… 1 an! Je n’ai trouvé le temps & la motivation que récemment, avec la reprise du boulot j’ai tellement moins de temps pour coudre… Mais c’est la vie! Et puis le projet « Je couds ma garde-robe capsule 2017 » de @clo_piano m’a vraiment boostée, car un vêtement de saison par mois c’est réalisable et le faire avec toute la communauté couture c’est super motivant! Je salue donc cette belle initiative! Pour en revenir au patron, après mesures je suis partie sur un mix de 2 tailles: 42 en haut et 44 en bas. J’ai également fait une version rallongée de 14cm car le patron, fidèle à l’esprit caban, était aussi court que le modèle de chez Petit Bateau. Je suis vraiment ravie de mes modifications car j’ai un manteau qui est super fitté à ma morphologie (je salut le patron qui est vraiment très bien coupé, bravo Fanny) et a la longueur idéale (pour moi!).

So I purchased everything I needed right away: pattern, beautiful and oh so soft navy wool from Les Tissus du Renard, lovely zebra printed white and navy cotton lining from Pretty Mercerie & silver half-spheres anchor 23mm buttons from Au Ch’ti Bouton. So I had everything I needed, and everything stayed nicely put aside for… one year! It is only recently that I found the time and motivation to make it. Going back to a working mom life leaves me so little time to sew… But hey, c’est la vie! I was actually super boosted by @clo_piano’s « Je couds ma garde robe capsule 2017 » project because sewing one seasonal garment per month is really possible and doing that together with the sewing community realy motivates me! So props to this great initiative! Back to the pattern now, after measuring myself I had to create a mix between two sizes: 42 for the upper body and 44 for the lower body. I also added 14cm to have a longer coat as the Saint-Michel pattern, faithful to the traditional Sailor Coat, is as short as the one I did not purchase from Petit Bateau. I am really excited about my changes as I end up with a perfectly fitted coat for my body (props to Fanny for such an amazing cut) at the perfect length (for me!).

dsc_5422_fotor

Concernant le patron, je n’ai eu aucun problème jusqu’à l’assemblage de la doublure… Alors là, encore aujourd’hui je ne comprends pas les explications (Désolée Fanny!). J’avais pourtant déjà fait une Michelle et donc assemblé une doublure mais là… J’ai buggé. Et j’ai donc improvisé. Première chose que je n’ai pas lue sur le livret, j’ai fait un rentré avec la parementure devant pour ne pas que la doublure aille jusqu’en bas du manteau, ensuite j’ai trouvé que les petits points pour fixer le revers du bas du manteau se voyaient sur l’endroit, je les ai donc collés avec de la colle textile (pareil pour les poignets) et ça rend super bien! Et enfin j’ai cousu en laissant la doublure faire un petit revers, sur tout le bas et les poignets, c’était certes très long, mais le résultat est impeccable. Voilà, Fanny si tu me lis, peut-être étoffer le livret de quelques photos supplémentaires de l’assemblage de la doublure aiderait les plus novices!

Regarding the pattern, everything went nice and smooth until I had to attach the lining to the coat… Still today I cannot understand the explanations… (Sorry Fanny!) Even though I already made a Michelle, and therefore attached a lining, for this one I completely failed… So I had to improvize. First thing that I didn’t read in the sewalong, I tucked the seam allowance of the front facing and the front in so that the lining doesn’t go all the way to the bottom, then I thought that you could see on the right side the little hand sewn stitches to fix the hem of the main coat (and the wrists) in place so I decided to glue them instead and it looks wonderful! And finally I hand sewed the lining on the entire bottom and wrists living some margin for the lining to move upwards without pulling everything up. I think the finishing touches look amazing and the coat looks impeccable! Fanny I suggest you might add a few visuals of the attachment of the lining, that would be very helpful  for beginners!

Je ne suis ni originale, ni objective, mais ce premier manteau je l’adore… Quelle satisfaction quand le vêtement fini est exactement celui que l’on avait dans sa tête au départ… Tout ça combiné à un super patron et un super tissu, c’est le super combo! Mon prochain manteau sera rose mais je crois qu’il va devoir connaitre le même sort que mon St-Michel et attendre la saison prochaine, car pour le vêtement de février dans ma collection capsule, c’est un Ginger Jeans! Avec un costumer d’Ariel taille 7 ans au milieu, je ne vais pas avoir le temps de m’ennuyer ce mois-ci…

dsc_5412_fotor

I am not original nor objective but I just love my first coat… It is such a satisfaction when the finished garment looks exactly like the one you had in your head at the beginning… This combined with a geat pattern and an amazing fabric, it is just the super combo! My next coat will be pink but I’m afraid it will have to also wait for the next winter season because the February garment in my « 2017 Capsule Collection » is a pair of Ginger Jeans! With an Ariel costume size 7 yo in the middle, I don’t think I will have time to get bored this month…

dsc_5442_fotor

Credit photo: Stan D sur la petite jetée des Sables d’Olonne

Carlotta & Falbala: Faites l’une pour l’autre!

Je suis assez fan de l’univers des pin ups des années 40 & 50 donc quand Wear Lemonade a sorti sa  collection d’été j’ai flashé sur quasiment tous les modèles car ils avaient ce petit look pin up! La petite touche retro de chaque pièce était parfaitement dosée pour que les patrons proposés restent des modèles cools & féminins. J’ai commencé avec le maillot Ursula (voir mon article ici) et j’ai enchaîné sur la blouse Falbala puis sur le short Carlotta! Je précise que je me suis abonnée pour 3 mois aux patrons PDF de Wear Lemonade, super cet abonnement qui m’a donné accès à tous les patrons pour 8,90€ par mois, soit même pas 30€ au total! Le pied! J’ai fait ma frileuse et je n’ai pas pris l’abonnement sur 6 mois ou 1 an mais les choses peuvent encore changer!

I am quite a fan of the 40’s & 50’s pin up world, and when Wear Lemonade released their summer collection I liked almost every pattern because each had that pin up look! This little vintage touch on each model was perfectly dosed so the garments were still cool and feminine. I started with the Ursula swimsuit (check my review here) then I went for the Falbala blouse and I finished with the Carlotta shorts! I subscribed to the PDF pattern library proposed by Wear Lemonade, this is so cool because for 8,90€ a month I have unlimited access to all their patterns, less than 30€ in total! I got cold feet & did not go for the 6 months/1 year subscription but you never know I can change my mind!

Pour ce qui est des tissus, c’est en voyant la version de Falbala de @corneliadixit que ça a été une évidence! Ce jersey ajouré blanc acheté en coupon de 3m sur le site des Coupons de Saint Pierre serait parfait pour cette jolie blouse. Il est assez lourd donc les volants tombentt nickel et le côté extensible m’a fait choisir une taille en dessous (40) et heureusement car si elle n’est pas rentrée dans le pantalon elle est vraiment large en bas. Et jersey = pas d’ourlet (oui je sais je suis fainéante). Le côté ajouré rajoute un peu de sexy à cette blouse qui l’est déjà! Pour Carlotta, j’avais ce tissu d’ameublement imprimé feuilles de palmier trouvé chez Mondial Tissus qui allait parfaitement avec mon jersey ajouré. Pour la taille j’ai fait un 42 (on ne peut pas tricher à tous les coups…) qui me va nickel!

Regarding the fabrics, it’s when I saw @corneliadixit’s version of Falbala that I knew I was gonna make mine in the gorgeous see through white jersey I had bought from Les Coupons de Saint Pierre. This fabric is quite heavy so the ruffles fall perfectly and the stretch in it made me go for a smaller size (40) and I am glad I did as the bottom of the blouse is quite wide if not put inside some pants. And jersey = no hem! (Yes I am lazy). The see through detail makes it sexier than it already is! For Carlotta I had this upholstery with printed palm tree leaves bought at Mondial Tissus which matched pretty well the see through jersey. I made a size 42 for the shorts (you can’t cheat all the time…) which fits me perfectly!

Franchement j’aime beaucoup ces deux patrons! Savant mélange entre le confortable, le féminin & le rétro! Pour la blouse je la referai certainement moins large en bas, mais j’adore le dos & les manches. Pour le short, rien à dire! J’adore la taille haute, l’empiècement sur les fesses & le revers! Sinon je vous conseille l’abonnement Wear Lemonade si comme moi vous ne possédiez aucun patron de cette marque (A part les gratuits… hi hi!). J’ai donc pu télécharger toux ceux qui me plaisaient et je pourrai télécharger ceux qui vont sortir dans les 3 mois de l’abonnement que j’ai souscrit! Merci Wear Lemonade pour ces patrons tendances, cools, féminins & qui vont bien ensemble! Quel sera le prochain? Restez connectées!

DSC_4464_Fotor

Honestly, I love both patterns very much! A perfect mix of cool, feminine & vintage! For the blouse, I’ll make it again with a narrower bottom but I just love the back & the sleeves! Regarding the shorts, nothing to say! I love the high waist, the bottom yokes & the turned up hem! I really encourage you to subscribe to the pattern library of Wear Lemonade if, like me, you did not own patterns of this brand (except the free ones… hi hi!) I could download all the patterns I liked and will be able to download the ones that will be released within the 3 months of my subscription. Thanks Wear Lemonade for such trendy, cool, feminine & matching patterns! Which one will I do next? Stay tuned!

Sabots/Clogs: You-You! (Sabots traditionnels de la Sablaise que j’ai depuis forever, vive la tradition! Traditional clogs of the Sablaise outfit which I own since I don’t know when, love the tradition!)

Crédit photo: Stan D.


Aime comme Mi Amore aka Aime comme Mystère #2…

Je n’avais pas participé au première épisode d’Aime comme Mystère initié par Aime comme Marie car je crois que j’étais arrivée trop tard sur le dossier et surtout j’étais un peu réticente de partir dans un projet couture à l’aveuglette comme ça. Mais quand l’épisode #2 a été annoncé je n’ai pas hésité une seconde! Et au final je ne le regrette pas! Parce qu’une petite robe légère d’été c’est ce qui manquait à ma garde robe! Le fait de recevoir les pièces du patrons au compte goutte assez amusant, on se laisse prendre au jeu, surtout pour la dernière partie! A refaire sans hésitation, les patrons de Marie étant toujours « casual chic » on ne peut pas se tromper! On m’a déjà fait des compliments sur ma robe donc pour moi c’est un succès! Mon tissu, dont j’ignore complètement la matière, est très fluide mais avec un toucher coton. Je l’ai trouvé aux Tissus du Renard du Château d’Olonne, et il en reste!

I didn’t take part in the first episode of the « Aime comme Mystère » challenge initiated by Aime comme Marie partly because I found out about it a bit late and mostly because I was kinda chilly going into a sewing project blindfolded like that… But when the second episode was announced I did not hesitate one second! And at the end, I don’t regret it at all because a light summer dress was all that was missing from my wardrobe! I kinda enjoyed receiving the pattern piece by piece every week, it was fun! And you kinda get caught in the game,  expecting the next part impatiently, especially the last one! I will certainly take part in the next episode, as the Aime comme Marie patterns are always so casual chic you cannot go wrong! I have already been told my dress was lovely today so to me this means success! My fabric, which composition is totally unknown to me, is very fluid but yet has the touch of cotton. I found it at Les Tissus du Renard from Le Château d’Olonne and there’s still some left on the roll!

Maintenant rentrons dans les détails. Personnellement je n’ai rien à redire à la coupe que j’aime beaucoup, à part en effet que ça taille un peu large. J’ai ôté 4cm sous l’emmanchure en descendant progressivement mourir à l’ouverture de poche. Je n’ai rien enlevé à la partie jupe car je passe juste mon popotin pour l’enfiler, fermeture grande ouverte! Les seuls reproches que je ferai concernent le livret d’explications:

  • Le détail de pose du biais n’est pas correct. Il écrit que les bords du biais se rejoignent à la couture d’épaule or c’est à la fermeture éclair. Et du coup nous n’avons pas les conseils de finitions du biais sur la fermeture.
  • Les légendes des croquis concernant l’envers et/ou l’endroit ne sont pas corrects, j’ai donc dans un premier temps mal monté mes manches.
  • Et surtout grâce aux bons conseils de @ateliermariepoisson j’ai bien repassé mon biais en l’arrondissant au fer vapeur pour qu’il prenne la forme de l’encolure et ainsi éviter qu’il baille. Ce serait un conseil à préciser dans un patron contenant une finition de col au biais. Sinon j’aurais, comme également conseillé, opté pour une parementure.

A plus pour de nouvelles aventures!

Now let’s get into details! I actually have nothing negative to say about the cut which I like a lot, except that the bodice is a little bit too wide indeed. I took off 4 cm below each armhole, then going down dying up to the beginning of the pocket. I didn’t take anything off from the skirt as my booty couldn’t go through a smaller size, even with the zip wide open! The only reproaches I will make are about the sewalong booklet:

  • The explanations about the sewing of the neckline’s bias binding are incorrect. It says that the ends meet at the shoulder seam but it is actually at the back zipper. And therefore we do not know how to make the perfect finish of the bias binding there.
  • The sketches captions regarding the right and/or wrong side of the fabric are wrong. This is why I wrongly attached my sleeves in the first place.
  • Most importantly, thanks to @ateliermariepoisson, I steam pressed my bias binding giving it the shape of my neckline so once stitched it falls flat on my chest, avoiding any disgracious gaping… Otherwise I would have gone for the facing instead

See you next time for my next adventure!

Crédit photo: Stan D

Le Maillot Ursula, ou comment j’ai dompté le lycra avec un point droit…

The Ursula Swimsuit, or how I tamed lycra with a straight stitch…

DSC_4324_copy_Fotor

Entre moi et ce maillot ça aura été « Je t’aime, moi non plus » tout du long… Mais au final je l’aime d’amour! Il y a eu beaucoup de discussions, sur Instagram principalement, pour souligner le manque de finitions du patron. Je m’en vais donc vous donner ma version, les points positifs comme les points négatifs, les difficultés rencontrées, les techniques découvertes, enfin tout ce qui pourrait vous faciliter la vie si vous décidez de vous lancez dans l’aventure Ursula! C’est parti!

Between me & this swimsuit it has been « I love you, me neither » all along the way… But at the end I love it truly, madly, deeply! There has been a lot of chatting, mostly on Instagram, to highlight the lack of finishing touches on this pattern. I am about to tell you all about my experience, the positive & the negative stuff, what has been difficult and what would help you get through it if you decide to start the Ursula project yourself! Let’s go!


DSC_4296_Fotor

Je dois dire que j’ai littéralement flashé sur ce modèle dès le premier post sur Instagram de Lisa de Make my Lemonade qui portait Ursula lors de ses vacances en Nouvelle Zélande… C’est donc avec impatience que j’ai attendu la sortie du patron, que je me suis empressée de télécharger dès qu’a été posté le tuto accompagné du patron pdf gratuit! Encore mieux! Ce que j’ai adoré sur ce modèle: la culotte taille haute et le dos à tomber! J’étais un peu plus sceptique quand au haut un peu « brassière », moi qui aime être bien soutenue au niveau de la poitrine. Ce problème a été vite résolu quand j’ai vu une astuce postée en commentaire du tuto par Laure: Doubler le haut et y insérer des pads en mousse (trouvés sur le site de Kiabi!)

Collage_Fotor_Fotor

I must say I instantly loved this swimsuit from the very first picture posted by Lisa of Make my Lemonade on her Instagram during her holidays in New Zeland… So I impatiently waited for the pattern launch, which I download as soon as was posted the tutorial along with the free pdf pattern! Even better! What I loved about this swimsuit: The high waisted bottom and the gorgeous back! I was more sceptical about the shape of the top as I am used to more bust support. But this problem quickly found itself a solution when Laure posted the following advice: Line the top and insert foam pads (found on Kiabi’s website!)

DSC_4314_copy_Fotor

Pour le tissu, j’avais en tête d’utiliser un vieux legging trop petit acheté chez Asos dans un super imprimé ethnico zébré. J’ai du compléter avec un lycra noir car pour respecter la symétrie des motifs j’ai du sacrifier du tissu imprimé et au final je n’en avais pas assez. Vous noterez les super raccords de ma couture au milieu du devant et du derrière de la culotte et du devant de la brassière 😉 (auto jettage de fleurs ça fait du bien…). Puis, suite à une discussion avec @green.gprice sur Instagram (merci pour tous tes bons conseils!) j’ai doublé le maillot avec un tissu spécial à cet effet de chez Pretty Mercerie, en suivant pour le bas le tuto du « Soma Swimsuit » de Papercut Patterns.

For the fabric, I had in mind to use a zebra/ethnical printed Asos legging that was too small for me. I had to complete with black lycra as I had to sacrifice some of the printed fabric to respect the symmetry of the patterns. You will notice the great pattern match at the center seam of the bottom’s front & back and on the front of the top 😉 (self congratulation here….). Then, following a discussion with @green.gprice on Instagram (thank you so much for your great advices!) I decided to line the bottom with a special fabric dedicated to lining swimsuits found at Pretty Mercerie according to the Papercut Pattern tutorial of the « Soma Swimsuit ».

Jusqu’ici tout va bien… Mais c’est là que les choses se gâtent et que nous allons aborder les aspects « arrachage de cheveux / utilisation intense du découd-vite »… Votre bon sens, ainsi que tous les tutos du net, vous répètent que du lycra se coud avec un point zigzag? Bah oui… Alors il faut savoir que j’ai une machine tout ce qu’il y a de plus basique: une Toyota « jeans » JFS21 mécanique qui ne possède que ce fameux point zigzag et pas le point « stretch » (sur lequel je ne peux donc pas me prononcer). Sauf que le point zigzag étire le tissu (je précise que j’ai pas tiré sur mon tissu à la couture ), on se retrouve donc avec des ouvertures qui gondolent (photo ci-dessous en haut à gauche). De plus, comme souligné sur Instagram, le point un peu bizarre du patron est l’absence d’élastique à la taille et aux ouvertures des jambes du bas du maillot… Pour faire court (je passe sur les multiples essais que j’ai dû ensuite découdre), la solution a été trouvée en deux temps: #1: Coudre un biais élastique à la taille et aux ouvertures des jambes (merci @fox_or_unicorn pour le tuyau!) et #2, tout ça au point droit! AAAAH HA! Quoi? Un point droit sur du lycra?! N’importe quoi! Et ba si! Alors que j’étais sur le point de tout jeter à la poubelle, je suis tombée sur cette vidéo géniale et ça a littéralement sauvé la vie d’Ursula et je vous confirme ça marche, et les coutures sont hyper élastiques!

So far so good… Now things started to go bad creating some « hair pulling / seam ripper overusing » situation… Your common sense, and all online tutorials, are telling you to use a zigzag stitch on lycra? Duh… of course. You must know that my sewing machine is a very basic one, a mecanical JFS21 Toyota « jeans » that only has the above mentioned zigzag stich and not the « stretch stitch » (about which I cannot comment). But the zigzag stitch stretched my fabric (I insist on the fact that I did not pull my fabric while stitching) and I ended up with « wavy » leg holes (top left picture above). In addition, as pointed out on Instagram, the weird thing about the pattern is the lack of elastics at the waist and at the leg holes… To make a long story short (I won’t detail my numerous attemps which I had to seam rip), the solution was double: #1: Stitch an elastic bias binding at the waist and leg holes (thanks @fox_or_unicorn for the tip!) & #2: with a straight stitch! AAAAH HA! Come again? A straight stitch on lycra?! Nonsense! Well yes ladies! As I was about to throw everything in the trash I ended up watching this incredible video and that litterally saved Ursula’s life… And it works indeed, my seams are stretching!

DSC_4330_copy_Fotor

Pour résumer voici ce qui manque à Ursula & que vous devez rajouter pour un super rendu:

  • Doubler la culotte
  • Coudre un biais élastique à la taille et aux ouvertures des jambes
  • Doubler le haut entièrement (Ici je n’ai juste pas fait d’ourlets au dos pour ne pas avoir de coutures apparentes)
  • Insérer des coussinets en mousse (Même pour les petites poitrines, je trouve que ça fera moins plat)
  • Froncer le volant (je n’ai pas vu cette étape dans le tuto, du coup le mien fait un peu « plaqué »)
  • Faire un ourlet roulotté au volant
  • Fixer le volant avec des petits points pour ne pas qu’il se retourne constamment (c’est du vécu et le mien n’étant imprimé que d’un côté ce n’était pas très joli)
  • Coudre un élastique sous les seins (dans la doublure) en plus des fronces (Vous pouvez zapper la bande auto-agrippante)

Malgré les points ci-dessous la principale chose à retenir est que la coupe du maillot Ursula est juste dingue! C’est à vous de faire des finitions parfaites. C’est exactement le maillot que je cherchais, la culotte haute est juste parfaitement coupée. Personnellement je me suis fait une taille 44 alors que je fait 40/42 dans le commerce pour les bas de maillot. Surtout faites la taille qui correspond à votre tour de hanches dans la grille des mensurations, c’est le plus important. Si vous avez des questions n’hésitez pas! Mais d’abord: plongeon!

output_wbOPq7

To sum things up, here what Ursula is missing for a perfect finish:

  • Line the bottom
  • Sew an elastic bias binding on the waist & leg holes
  • Line the top entirely (not done here, I just left the edges raw to avoid showing stitches)
  • Insert foam pads (Even for small busts, I think it just prevent the « flat chest » effect)
  • Gather the ruffle (I missed this step somewhere and mine looks a little bit « flat »)
  • Make a rolled up edge at the ruffle
  • Fix the ruffle in place with tiny stitches so it won’t turn over constantly with the wind (my own experience here and mine was only printed on one side so it did not look very nice)
  • Sew an elastic below the breasts (inside the lining) in addition to the gathers (you can forget about the « anti-slipping bands »)

Despite the above mentioned alterations, the main thing to keep in mind is that the style of this swimsuit is just crazy! So it is up to you to make it perfect. It is exactly the cut I was looking for, the high waisted bottom fits me perfectly. I made myself a size 44 even though I am a 40/42 in retail swimsuits bottoms. Most importantly, make the size corresponding to your hips length in the measurement chart. If you have any questions do not hesitate! But first, let’s dive!

DSC_4351_Fotor

Crédit photo: Stan D

Retouches bourrelets: Clément M. (Hi hi hi…)

2 petits tours de Manège…

Depuis le temps que j’attendais un patron de short qui me plaise! Et là avec « Aime Comme Manège » j’en ai 2 pour le prix d’1! Et pour cet été j’ai été inspirée par des imprimés très colorés! Sur les 3 versions du patrons (très bonne initiative de Marie!) j’ai adoré la jupe culotte & le short taille haute que j’ai respectivement réalisés dans une viscose à imprimé tropical & dans les chutes de mon sublime tissu d’ameublement « plumes fluo » Stof, les deux trouvés ou? Aux Tissu du Renard évidemment! (Pour celles qui voudraient commander le tissu plume en ligne il est dispo ici)

I had been waiting for the perfect shorts pattern for a while when I got 2 with the « Aime comme Manège » pattern! For this summer I was inspired by very colourful fabrics! Among the 3 versions of the pattern (thanks for that Marie!) I loved the culotte skirt & the high waisted shorts which I made respectively in bright tropical printed viscose & in the fabric I had left of neon feathers printed cotton of Stof Fabrics. Both found were? At Les Tissus du Renard of course! (For those who might want to order the feathers fabric online it is available here)

J’ai commencé par réalisé la version jupe culotte. C’est la plus compliquée des 3 avec ses poches à revers et surtout ses plis qui m’ont bien donné mal au crâne! Mon conseil? Avant de fixer les plis du devant avec une couture vérifier que la longueur du devant une fois les plis faits correspond bien à la longueur du devant de la ceinture! Mais bon pas grave, mon découd vite était fidèle au poste… La coupe est vraiment très sympa & le short est tellement agréable à porter. J’adore la ceinture avec le devant plat thermocollé et le derrière élastiqué. Top!

I started with the culotte skirt. It is the most technically complicated version of the 3 proposed in the pattern, with its lapel pockets and its pleats which gave me the beginning of a headache! My advice? Before sewing the pleats in place, check the length of the front (once the pleats pinned) matches the length of the waistband front. But don’t worry, my seam ripper was here, as always…The cut of those shorts is really nice and it is the most comfortable thing to wear! I just love the waistband with its flat front and elasticated back. Amazing!

Pour le second il me restait juste assez de tissu après le joli sac de plage fait pour la nounou de ma fille. J’ai choisi la version taille haute parce que je ne porte plus que ça maintenant, c’est plus flatteur à ma morphologie et surtout plus confortable (On ne dit pas que ça tient aussi le ventre hein?). Pour la taille chez Aime comme Marie je fais LL (encore et toujours mon 106cm de tour de hanches) et du coup la version taille haute, qui est près du corps, baille un peu à la taille. Je le saurai pour la prochaine fois! Je rajouterai aussi des poches sur les côtés et derrière parce que ça manque je trouve. Mais sinon très bonnes coupes et techniques simples. Petit détail: j’ai trouvé qu’il y avait plusieurs erreurs dans les légendes des schémas du livret. Suivez les textes et au moins il n’y aura pas d’erreurs!

For the second pair I had just enough fabric from the lovely beach bag I made for one of my daughter’s nannies. I went fo the high waist because I only wear those now, it suits me better and mostly it is so comfortable (We won’t say it also « holds » our belly, will we?). I am a size LL with the Aime comme Marie patterns (thank you 106cm wide hips) and so for the high waisted version, which is tight to the body, it is a little bit gaping at the waist. I will keep that in mind for the next time I make a pair. I will also add side and back pockets because I think it is missing. Overall, I like the different styles and simple sewing techniques. Small detail though: I found a few mistakes in the captions of the sketches in the booklet. Just follow the text instructions and there won’t be any mistakes! 

Crédit Photo: Stan D.

« Teddy HB » graphique ou mon (premier!) test de patron pour Louis Antoinette…

DSC_3785

Il y a quelques semaines j’ai eu la joie (et surtout la surprise!) d’être contactée par Floriane de Louis Antoinette Paris, qui, suite à ma proposition lors du concours « La Parisienne », voulait savoir si cela m’intéressait de tester un des patrons de leur future collection! (Joie intense). Je pensais le monde des testeuses assez fermé et reservé à celles qui avaient fait leurs preuves (et qui ont plus de 1500 abonnés sur IG lol) donc c’est avec beaucoup d’enthousiasme et de fierté que j’ai (évidemment) accepté! Et là, je reçois un visuel de ma future réalisation: un teddy! Woohoo! Juste ce que je cherchais pour compléter ma collection de vestes… Et alors quel teddy… Encore merci Floriane pour ta confiance, réaliser ce teddy et participer à l’aventure Louis Antoinette Paris a été un réél plaisir pour moi!

A few weeks ago I was lucky enough (and surprised!) to receive an email from Floriane of Louis Antoinette Paris, who, following my interpretation of « La Parisienne », wanted to know if I was interested to test one pattern from their upcoming collection! (Intense joy here). I thought that the testers world was kinda of restricted (like a VIP area) reserved for well known sewing bloggers (with at least 1500 followers on IG lol) so it is with great enthousiasm & pride that I (obviously) said Yes! An then I received the visual of my future making: A teddy! Woohoo! Exactly the piece I needed to complete my jacket collection… And what a teddy… Thank you again Floriane for your trust, it was a true blast for me to take part of the Louis Antoinette journey!

Après l’euphorie de la nouvelle, la question fatidique est tombée: Quel style je vais donner à mon teddy et surtout dans quel tissu?! Le hasard a voulu qu’au même moment Julie de Jolies Bobines mette en vente quelques coupons de tissus dont ce sublime jacquard graphique noir et blanc. J’ai littéralement flashé dessus et l’association jacquard/teddy s’est vite imposée. Un des gros avantages de ce patron c’est qu’on peut jouer avec les différents empiècements du devant. Je suis partie direct sur des manches contrastées car je voulais vraiment un esprit vintage, un peu dans le style des varsity jackets des campus universitaires américains. J’ai choisi la suédine de chez Pretty Mercerie (après avoir vu le top Areli de la jolie Emilie Pangrazzi!) en noir pour les manches et le devant, une doublure satin noire à pois blancs (trop douillette!) et enfin j’ai ajouté deux écussons sur les manches, toujours dans cet esprit Campus US Vintage.

After the euphoria of the news, the unavoidable question dropped: What would be the style of my teddy, and most importantly… what fabric will I use?! The lucky coincidence was that at the same time, Julie from Jolies Bobines was selling some of her coupons, among which this gorgeous black & white graphic jacquard. I instantly loved it and the combination teddy/jacquard just obviously made sense. One of the biggest advantages of this pattern are the endless customization possibilities thanks to the different pieces of the front. I immediately decided to go for contrasted sleeves as I wanted to give it a vintage spirit, a bit like the varsity jackets from the US university campuses. I chose the lovely suede fabric (after seeing Emilie Pangrazzi’s lovely Areli top!) from Pretty Mercerie, in black for the sleeves & fronts, a black satin lining with white little dots (so comfy!) and finally I added two badges on the sleeves, still in that vintage US campus spirit.

J’avoue que quand j’ai vu que la difficulté était de 4/4 j’ai à peine flippé… ok j’ai pas mal flippé… Ma chance c’est que juste avant j’avais cousu ma première veste, la jolie Michelle de République du Chiffon, donc assemblage de col et montage de doublure étaient tout frais dans ma tête! Le plus difficile à mon sens c’est de surpiquer les élastiques des poignets une fois la manche assemblée (doublure + tissu) car la marge de manœuvre est riquiqui et il faut tendre au fur et à mesure… J’ai enlevé 4cm à chaque épaule des petits côtés. Pourquoi?  Parce que je suis de nature très carrée, et le fait d’avoir choisi de contraster les manches de mon teddy combinée avec la coupe « épaules loose » du teddy n’ont fait qu’accentuer ma carrure en donnant au devant de mon teddy une forme en « V ». Ci-dessous vous verrez en haut à gauche la photo « avant modif », en bas à gauche la photo « pendant modif » avec mon épaule droite modifiée, en haut à droite ce que j’ai coupé et enfin en bas à droite la photo « après modif ». Je pense que si j’avais fait le teddy entier dans le même tissu je n’aurais pas eu à faire la modif!IMG_0203

I must admit that when I saw the 4/4 difficulty rate I slightly freaked out, well ok , I freaked out a lot… My luck was that I had just finished sewing my first jacket, the lovely Michelle from République du Chiffon, so building a collar & attaching a lining were fresh stuff in my mind! The hardest thing for me was to topstitch the elastics of the sleeve cuffs once the sleeves were assembled (lining + fabric) because you have to pull the elastic as you sew and the cuffs are so tiny to move around… I took off 4 cm on each shoulder of the small sides. Why? First, I have a quite wide shoulder span and the fact that I chose to do contrasted sleeves and the « loose shoulders » cut of the pattern give the jacquard front of my teddy a « V » shape which enhanced my wide shoulder span… Above on the left top corner you have the « before modification » picture, then on the bottom left the « during modification » picture with my right shoulder modified, on the top right you have what I took off and finally on the bottom right you have the final « after modification » picture. I think that if I had done the whole teddy in the same fabric I wouldn’t have had to do the modification.

Voilà! Pour moi mon teddy c’est comme ma combi, ça ne va pas à ma morphologie mais il fallait que j’en fasse un! Heureusement je peux compter sur le talent de l’équipe de Louis Antoinette pour créer des patrons qui vont à tout le monde. Après il faut choisir les bonnes matières (la suédine c’est top! un beau jacquard ou même un sweat) et surtout le porter avec les bons vêtements. Pour les hanches larges comme moi il vaut mieux le porter avec un jean ou un short taille haute, une robe ou une jupe patineuse. En tout cas c’est une pièce très tendance, très féminine & surtout déclinable pour tous les styles! A très bientôt pour de nouvelles aventures couture!

There you go! To me my Teddy is like my Jumpsuit, it does not fit my body very well but I just had to make one! Fortunately I can count on Louis Antoinette’s team’s talent to create patterns that suit most bodies. Then you must choose the right fabric (suede is amazing! a nice jacquard or even sweatshirt fleece) and most importantly wear it with the right clothes. For wide hips like me, high waisted jeans or shorts, a dress or a skater skirt. Anyway it is an « it » piece, very feminine and so versatile! See you soon for new sewing adventures!

Crédit photo: Stan D.


Michelle pastelle…

DSC_3752

Michelle, celle que tout le monde avait faite sauf moi! Et pourtant il y a longtemps que je l’ai le joli patron pochette de République du Chiffon… Et si j’ai attendu aussi longtemps c’est pour 2 raisons, la première c’est qu’à l’époque j’avais peut-être un peu surestimé mes compétences en couture et la seconde c’est que je ne trouvais pas LE tissu dans lequel la faire ma Michelle. Et puis en me baladant au salon « Pour l’Amour du Fil » à Nantes je tombe sur ce superbe jacquard pastel sur le stand d’Un Chat sur un Fil et « flash »! J’ai vu ma Michelle! Et vous savez quoi? Elle est encore mieux que ce que j’avais pu imaginer!

Michelle, the one everybody sewed but me! I purchased the lovely pattern from République du Chiffon a while ago though… There are two reasons why I waited so long, first I might have overestimated my sewing skills back then and secondly I was waiting for THE fabric in which I would make my Michelle. Then, while looking around at the « Pour l’Amour du Fil » fair, I ended up staring at this gorgeous pastel jacquard on Un Chat sur un Fil‘s booth and « flash »! I saw my Michelle! And you know what? It looks even better than what I had imagined!

Alors évidemment je n’y serais jamais arrivée aussi facilement sans le tuto « pas à pas » de Géraldine! Ses explications étaient limpides! C’était ma première vraie doublure. J’ai choisi un coton rose tout simple avec des petits motifs blancs trouvé aux Tissus du Renard. Avec le recul, ce tissu est un peu épais mais franchement avec le pli d’aisance dans le dos c’est extrêmement confortable à porter. Je l’ai fait en 42 et si j’avais du la fermer avec des boutons il aurait fallu un bon 44! Je n’ai rien changé au patron, j’ai juste enlevé la petite poche poitrine, le motif étant déjà assez chargé en motifs.

Of course I couldn’t have made my Michelle so smoothly without Géraldine’s wonderful « step by step » sewalong! Her explanations were cristal clear! It was my first real lining. I chose a very simple pink cotton with little white patterns found at Les Tissus du Renard. Looking back now, I would have chosen a lighter fabric but honestly with the fold ease it is a very confortable garment to wear. I made a size 42 but honestly if I had wanted to close it with buttons I would have needed a 44! I followed the pattern exactly, I just didn’t put the little heart pocket as the fabric already had different patterns on it.

Je pense qu’il y aura d’autres Michelle car ce patron est vraiment un excellent basique déclinable à souhait dans plein de styles différents. Je l’adore!

I think there will be more Michelle to come as this pattern is such a good basic which offers a wide range of possible different styles. I just love it!

DSC_3763

Crédit Photo: Stan D.

Lieu: Cabines du P’tit Bar, plage des Sables d’Olonne

Blue Facet Sirocco

Le joli dos décolleté du « Sirocco » de Dessine moi un patron, il y a longtemps qu’il m’avait tapé dans l’oeil. Et ça faisait aussi très longtemps que j’avais envie de me coudre quelque chose dans le tissu « Facet » bleu d’Atelier Brunette (j’avais déja cousu une jolie couverture de naissance dans la version nude). J’ai trouvé le patron sur le stand d’Un Chat sur un Fil au salon « Pour l’amour du fil » de Nantes il y a quelques jours donc je n’avais plus qu’à commander le tissu, chez Perles & Co car ils avaient aussi un tissu « paon » à tomber, à découvrir ici très prochainement 😉

I’ve been eying with envy the « Sirocco » pattern of Dessine moi un Patron for some time now. Same thing for the blue « Facet » fabric of Atelier Brunette (I had already sewn a lovely baby blanket in their nude version). I got the pattern a few days ago on the booth of Un Chat sur un Fil at the « Pour l’Amour du Fil » fair in Nantes. I only had to order the fabric online and I took it on Perles & Co together with a « peacock » fabric to die for & to discover here pretty soon 😉

C’est ma première réalisation d’un patron de « Dessine moi un Patron » et c’est très clair au niveau des explications et les petits dessins aident beaucoup (notamment la technique pour coudre l’enforme/parementure au devant & dos). J’ai entoilé les enformes comme recommandé pour les tissus fins pour plus de tenue et j’avoue que le rendu des épaulettes est canon! Je l’ai fait en taille 42 (foutues hanches) mais je serais rentrée dans du 40 je pense. Je suis super contente du résultat même si au final je trouve que ce modèle accentue ma carrure déjà bien large, mais c’est pas grave car le dos sexy l’emporte!

DSC_3547

This is my first making of a « Dessine moi un Patron » pattern. I found the sewalong booklet very clear and the little sketches very useful (especially the one that shows the technique to attach the facings to the front & back). I interfaced the facings as recommended for light fabric like the viscose I used so it holds better, and the shoulders look lovely indeed! I made a size 42 (damn you hips) but I think I could fit into a 40. I am very happy with the final result despite the fact that it enhances my already wide shoulder span but it’s OK because the sexy back wins the day…

DSC_3537

Crédit photo: Stan D.


Magellan Vs Macaroni

Avant le mois dernier je n’avais encore jamais craqué sur un patron « Aime Comme Marie » et là… bam! Deux d’un coup! Ca doit être l’effet « volants »… Je les ai immédiatement adorés parce que c’est ce qui manque à ma garde-robe: blouses, tuniques, chemises, t-shirts manches longues, etc. Je les aime aussi parce que malgré leurs similitudes techniques ils sont très différents dans leur style. Le Magellan est destiné à des tissus non extensibles alors que le Macaroni est plus pour des tissus extensibles type jersey ou molleton. Comme pour la plupart des patrons j’ai du me faire une double taille, en l’occurrence ici: L en haut et LL aux hanches. Au final je pense que j’aurais pu tout loger dans un L malgré mon 104cm de tour de hanches…

Before last month I had never purchased an « Aime Comme Marie » pattern and then… bam! two at once! It must be the « ruffle » effect… I instantly loved them because it is the kind of garment my wardrobe is missing right now: tuniques, tops, blouses, shirts, t-shirts with long sleeves, etc… I also love them because even though they are quite similar technically, they are very different in their style. Magellan is more for woven fabrics when Macaroni is a knit pattern! For jersey of French Terry for instance. As for many patterns I had to make myself a « double size », here it was a L for the top and a LL for the hips. Now that I’ve worn them I think I would fit in an L despite my 104cm hips circumference…

Pour le Magellan j’ai utilisé un tissu très fin (100% coton?) avec un motif camouflage très sympa dans des nuances de gris. J’avais acheté ce tissu il y a longtemps aux Tissus du Renard et je n’avais jamais trouvé quoi faire avec jusqu’à Magellan! Je l’adore malgré la grosse difficulté à le repasser bien comme il faut… Il froisse grave! Pour le Macaroni j’ai utilisé le reste de molleton gratté rayé marine et blanc trouvé chez The Sweet Mercerie avec lequel j’avais déjà fait un « Confortable » de MLM Patrons pour ma Maman. Il ne m’en restait pas assez donc j’ai du altérer les volants et du coup le rendu est un peu bizarre, ils roulent vers l’intérieur! Pour l’encolure, j’ai préféré ajouter une parementure plutôt qu’un col.

For the Magellan I used a very light fabric (100% cotton?) with an army pattern in shades of grey. I had purchased this pattern some time ago at Les Tissus du Renard but I couldn’t decide what to do with it until Magellan! I really like it despite the difficulty to iron it really neatly… it just creases! For the Macaroni I used a what I had left of brushed fleece sweatshirt with Navy stripes I had purchased at The Sweet Mercerie and with which I already made my Mom a « Confortable » from MLM Patrons. I didn’t have enough left so I had to alter the ruffles therefore they look a bit funny, they just roll inside! For the collar I chose to add a facing rather than a neckband. 

Je suis super contente de mes deux tops « Aime comme Marie », j’ai beaucoup aimé les patrons pochettes, le packaging & les explications très simples. J’ai même appris à faire des ourlets roulottés avec ma surjeteuse! Le top! J’en ferai certainement d’autres versions, j’ai déjà refait un Macaroni pour ma cop’s en jersey fin et ça rend super bien aussi! A très vite!

I am very happy with my two « Aime comme Marie » tops, I really loved the printed patterns, the packaging & the very simple sewalong booklet. I even learnt how to sew rolled edge hems with my serger! What else?! I will certainly make other versions, like the Macaroni I made for my friend in light jersey, it just looks so pretty! See you soon!

Crédit Photo: Stan D.